版权声明:本文为 @WildMeowth 的原创文章,可以转载,但请务必注明作者和出处!!!原文链接:wildmeowth
摘要
本文主要介绍IBM Websphere Portal下使用Spring 3 MVC创建一个基本的websphsere portlet.
- 创建
- jar包
- 配置
- 源码
正文
0.创建一个Portal Project
打开Rational Application Developer, 右键new一个新的Portal Project.
1.下载jar包
首先我们需要下载Spring 3 MVC所需要的jar包.
Spring 3 MVC Portlet 所需要的jar包可以去spring官网下载.
方便大家下载博主就直接贴出地址如下:http://repo.spring.io/release/org/springframework/spring
org.springframework.asm-3.0.4.RELEASE.JAR
org.springframework.beans-3.0.4.RELEASE.JAR
org.springframework.context.support-3.0.4.RELEASE.JAR
org.springframework.context-3.0.4.RELEASE.JAR
org.springframework.core-3.0.4.RELEASE.JAR
org.springframework.expression-3.0.4.RELEASE.JAR
org.springframework.web.portlet-3.0.4.RELEASE.JAR
org.springframework.web.servlet-3.0.4.RELEASE.JAR
org.springframework.web-3.0.4.RELEASE.JAR
将这些jar包粘贴到portal项目lib目录下即可.
2.配置文件
2. 1 配置web.xml
和往常一样, SpringMVCPortlet一样分别设置contextConfigLocation,ContextLoaderListener监听器, ViewRendererServlet视图渲染解析器.
全部代码如下:
1
2
3
4
5
6
7
8
9
10
11
12
13
14
15
16
17
18
19
20
21
22
23
24
25
26
27
28
<?xml version="1.0" encoding="UTF-8"?>
<web-app id="WebApp_ID" version="2.5" xmlns="http://java.sun.com/xml/ns/javaee" xmlns:xsi="http://www.w3.org/2001/XMLSchema-instance" xsi:schemaLocation="http://java.sun.com/xml/ns/javaee http://java.sun.com/xml/ns/javaee/web-app_2_5.xsd">
	<display-name>SpringMVCPortlet</display-name>
	<context-param>
		<param-name>contextConfigLocation</param-name>
		<param-value>/WEB-INF/context/applicationContext.xml</param-value>
	</context-param>
	<listener>
		<listener-class>org.springframework.web.context.ContextLoaderListener</listener-class>
	</listener>
	<servlet>
		<servlet-name>ViewRendererServlet</servlet-name>
		<servlet-class>org.springframework.web.servlet.ViewRendererServlet</servlet-class>
		<load-on-startup>1</load-on-startup>
	</servlet>
	<servlet-mapping>
		<servlet-name>ViewRendererServlet</servlet-name>
		<url-pattern>/WEB-INF/servlet/view</url-pattern>
	</servlet-mapping>
	<welcome-file-list>
		<welcome-file>index.html</welcome-file>
		<welcome-file>index.htm</welcome-file>
		<welcome-file>index.jsp</welcome-file>
		<welcome-file>default.html</welcome-file>
		<welcome-file>default.htm</welcome-file>
		<welcome-file>default.jsp</welcome-file>
	</welcome-file-list>
</web-app>
2. 2 配置portlet.xml
Spring Portlet MVC和其Web MVC可以说是如出一辙,只是在Web MVC中处于核心的DispatcherServlet在Portlet MVC中换成了DispatcherPortlet.
DispatcherPortlet配置在portlet.xml文件中,它继承了Portlet标准中的GenericPortlet,所以它本质上是一个能够将Portlet Request dispatch到Spring框架中其它MVC组件的一个Portlet.
创建portlet的时候, RAD会帮你创建一个portlet.xml文件, 我们只需要对其进行一些配置上的修改就可以了.
把其中的<portlet-class>标签中的值改成org.springframework.web.portlet.DispatcherPortlet
全部代码如下:
1
2
3
4
5
6
7
8
9
10
11
12
13
14
15
16
17
18
19
20
21
22
23
24
25
26
27
<?xml version="1.0" encoding="UTF-8"?>
<portlet-app xmlns="http://java.sun.com/xml/ns/portlet/portlet-app_2_0.xsd" version="2.0" xmlns:xsi="http://www.w3.org/2001/XMLSchema-instance" xsi:schemaLocation="http://java.sun.com/xml/ns/portlet/portlet-app_2_0.xsd http://java.sun.com/xml/ns/portlet/portlet-app_2_0.xsd" id="com.ibm.catebizpacustomerselectorwar.CatebizpacustomerselectorwarPortlet.87bcccfd63">
	<portlet>
		<description>SpringMVCPortlet</description>
		<portlet-name>SpringMVCPortlet</portlet-name>
		<display-name>SpringMVCPortlet</display-name>
		<display-name xml:lang="en">SpringMVCPortlet</display-name>
		<portlet-class>org.springframework.web.portlet.DispatcherPortlet</portlet-class>
		<init-param>
			<name>wps.markup</name>
			<value>html</value>
		</init-param>
		<expiration-cache>0</expiration-cache>
		<supports>
			<mime-type>text/html</mime-type>
			<portlet-mode>view</portlet-mode>
		</supports>
		<supported-locale>en</supported-locale>
		<resource-bundle>springmvcportlet.nl.HelloWorldPortletResource</resource-bundle>
		<portlet-info>
			<title>SpringMVCPortlet</title>
			<short-title>SpringMVCPortlet</short-title>
			<keywords>SpringMVCPortlet</keywords>
		</portlet-info>
	</portlet>
	<default-namespace>http://springmvcportlet</default-namespace>
</portlet-app>
这里以RenderRequest处理为例,当DispatcherPortlet接收到Request的时候,它会根据handermapping的配置找到相应的Controler来处理请求. Controler处理完后返回一个ModelAndView,对于View的处理则和Web MVC类似了,这里不再做介绍.
2. 3 创建applicationContext.xml
根据web.xml中配置, 在WEB-INF下创建一个context文件夹, 在其下创建一个applicationContext.xml的文件, 并写好配置.
我们可以在applicationContext.xml中设置HandlerMapping,ViewResolver,Controller等,本例中Controller,HandlerMapping在后面的文件中设置。
全部代码如下:
1
2
3
4
5
6
7
8
9
10
11
12
13
14
15
16
17
18
19
20
21
22
23
24
25
26
27
28
29
30
31
32
33
34
35
36
37
38
39
40
41
42
<?xml version="1.0" encoding="UTF-8"?>
<beans xmlns="http://www.springframework.org/schema/beans"
	xmlns:xsi="http://www.w3.org/2001/XMLSchema-instance" xmlns:context="http://www.springframework.org/schema/context"
	xsi:schemaLocation="http://www.springframework.org/schema/beans http://www.springframework.org/schema/beans/spring-beans-3.1.xsd
		http://www.springframework.org/schema/context http://www.springframework.org/schema/context/spring-context-3.1.xsd">

	<context:annotation-config />
	<!-- Message Source -->
	<bean id="messageSource" class="org.springframework.context.support.ResourceBundleMessageSource">
		<property name="basenames">
			<list>
				<!-- Add appropriate resource properties path -->
				<value>springmvcportlet.nl.HelloWorldPortletResource</value>
			</list>
		</property>
	</bean>

	<!-- Default View Resolver -->
	<bean id="viewResolver" class="org.springframework.web.servlet.view.InternalResourceViewResolver">
		<property name="cache" value="true">
		<property name="viewClass">
			<value>org.springframework.web.servlet.view.JstlView</value>
		</property>
		<property name="prefix">
			<value>/WEB-INF/jsp/</value>
		</property>
		<property name="suffix">
			<value>.jsp</value>
		</property>
	</bean>

	<!-- Abstract Default Exception Handler -->
	 <bean id="defaultExceptionHandlerTemplate"
		class="org.springframework.web.portlet.handler.SimpleMappingExceptionResolver">
		<property name="defaultErrorView" value="DefaultError" />
		<property name="exceptionMappings">
			<props>
				<prop key="com.ibm.AppException">appError</prop>
			</props>
		</property>
	</bean>
</bean>
2. 4 创建SpringMVCPortlet-portlet.xml
根据portlet.xml文件中<portlet-name>标签中的值(例子中是”SpringMVCPortlet”)+”-portlet.xml”为名字创建此文件, 并配置Controller,HandlerMappings.
全部代码如下:
1
2
3
4
5
6
7
8
9
10
11
12
13
14
15
<?xml version="1.0" encoding="UTF-8"?>
<beans xmlns="http://www.springframework.org/schema/beans" xmlns:xsi="http://www.w3.org/2001/XMLSchema-instance" xmlns:p="http://www.springframework.org/schema/p" xmlns:context="http://www.springframework.org/schema/context" xsi:schemaLocation="http://www.springframework.org/schema/beans http://www.springframework.org/schema/beans/spring-beans-3.0.xsd http://www.springframework.org/schema/context http://www.springframework.org/schema/context/spring-context-3.0.xsd">

	<context:annotation-config/>

	<!-- Controllers -->
	<context:component-scan base-package="com.wildMeowth.portal.springmvcportlet.controller" />

	<!-- Handler Mappings -->
	<bean class="org.springframework.web.portlet.mvc.annotation.DefaultAnnotationHandlerMapping"/>

	<!-- Exception Handlers -->
	<bean id="defaultExceptionHandler" parent="defaultExceptionHandlerTemplate"/>

</beans>
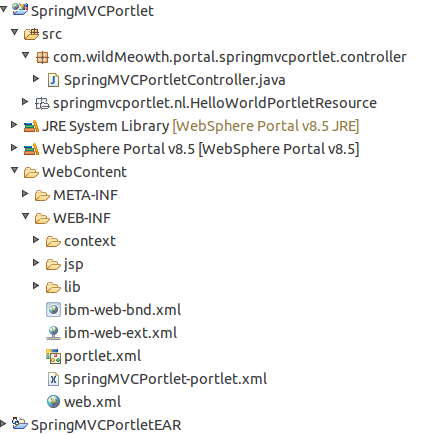
至此, 基本配置完成目录结构如下图:
3.代码部分
在com.wildMeowth.portal.springmvcportlet.controller包下创建一个类SpringMVCPortletController, 在类中写下如下代码:
1
2
3
4
5
6
7
8
9
10
11
@Controller
@RequestMapping("VIEW")
public class CusNameDisplayPortletViewController  {

	@RequestMapping
	public String handleRenderRequestInternal(RenderRequest request, RenderResponse response) throws Exception {

		return "index";

	}
}
在jsp目录下创建对应的index.jspjsp文件, 如下代码:
1
2
3
4
5
<%@ taglib uri="http://java.sun.com/portlet_2_0" prefix="portlet"%>
<%@ taglib uri="http://java.sun.com/jsp/jstl/core" prefix="c"%>
<%@ taglib uri="http://java.sun.com/jsp/jstl/fmt" prefix="fmt"%>
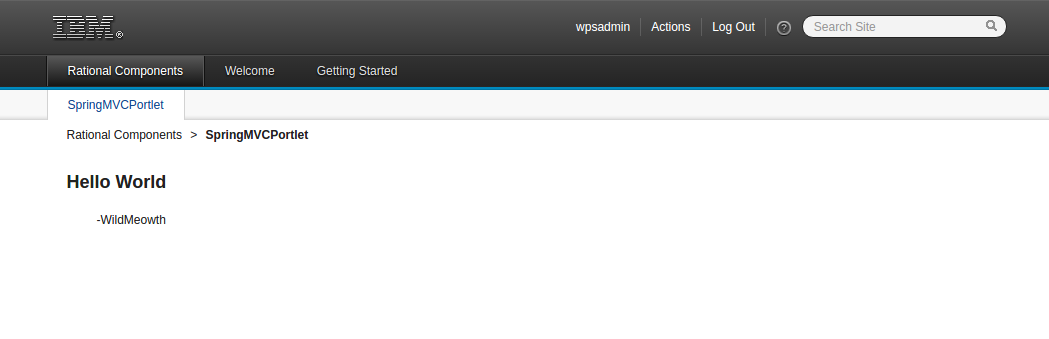
<h1>Hello World</h1>
启动服务器,最终效果如下图: